-1.png?width=240&height=100&name=Heading%20(2)-1.png)
Guest check-in is where you search for a guest, confirm their table or team, pre-authorize a credit card, and assign a bidder number before they head into your event. You can run check-in from the BetterUnite mobile app or from a web browser — both work off the same guest data, so your team can mix devices at the same event.
1. Where to Find Check-in within BetterUnite
-
On an iPhone or iPad, open the BetterUnite app (available in the Apple App Store), log in, and select your active campaign. You'll land on the check-in screen.
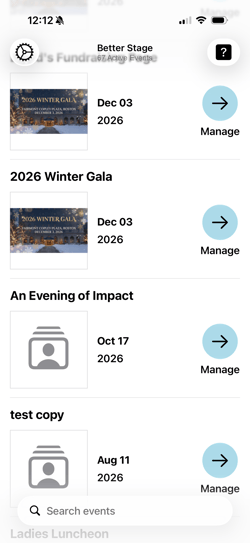
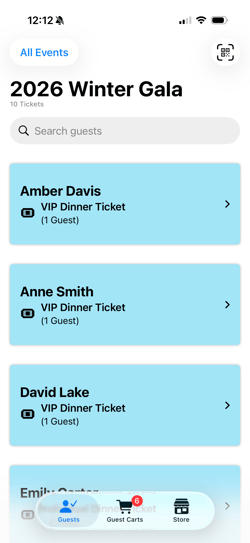
-
On a laptop, go to your event Dashboard and select Check-In Guests.
-
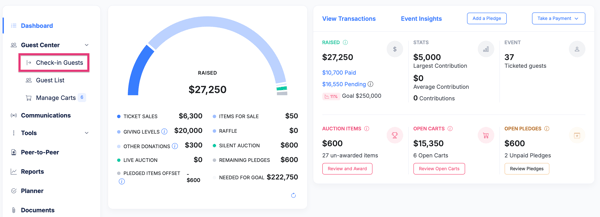
If your account only has guest check-in access, you'll land directly on this page.
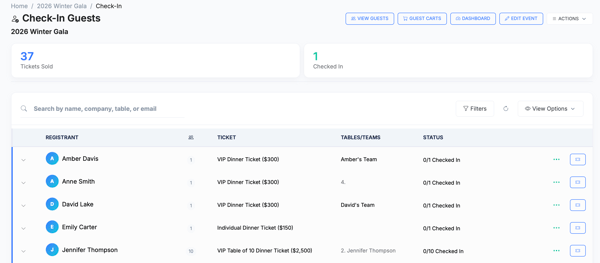
-
Use the search bar to find a guest by partial first name, partial last name, company, table number, or email. If a name is common, add the first letter of the last name to narrow the results.
Check-In Scenarios
Scenario #1: Single Guest Arrives at Check-In
1. Ask for the guest's name and type it into the search bar. Their ticket will appear at the top in green on the app or under Guests.
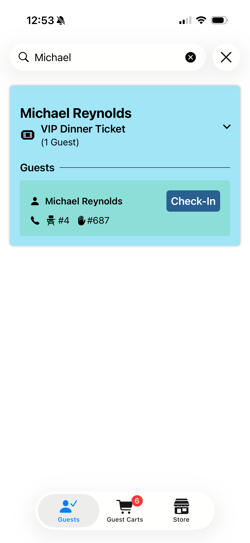
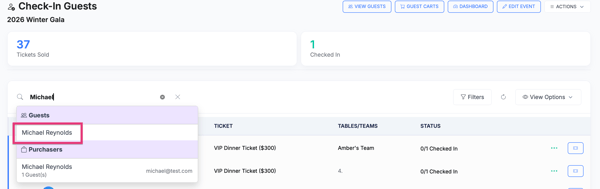
2. Click the guest's name to pull up their check-in screen. Confirm their phone number and tap Send. This texts a welcome message with their table or team assignment and their personal guest experience link, where they can bid, donate, buy items for sale, and watch the live auction. Email works too, if needed.
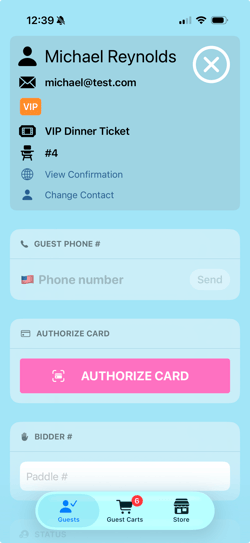
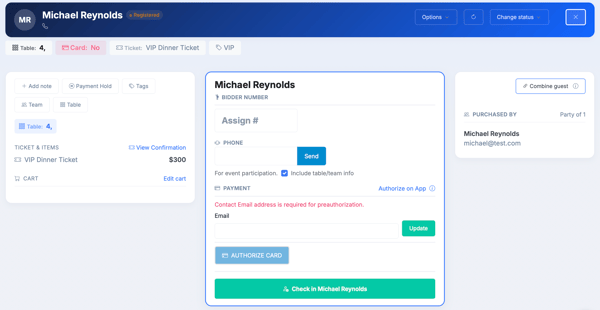
3. Pre-authorize a card if your organization collects cards at check-in, and ask if they'd like to help cover the transaction fee. Toggle on the Opt-in if they say "yes."
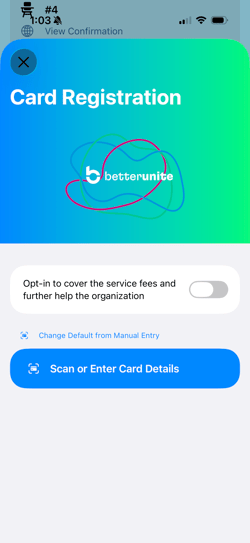
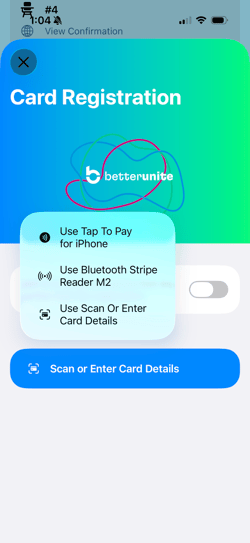
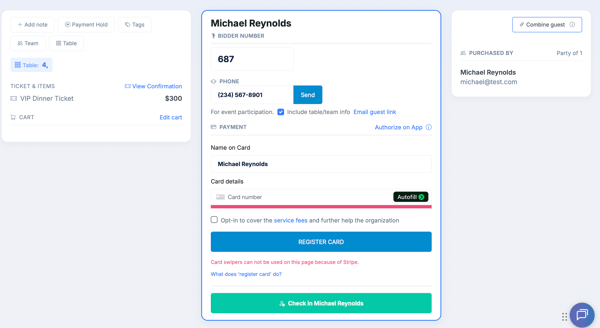
4. Assign or confirm the guest's bidder number, then tap Check In. ***The bidder number is the most important part. Please be sure to double check that it is entered correctly.***
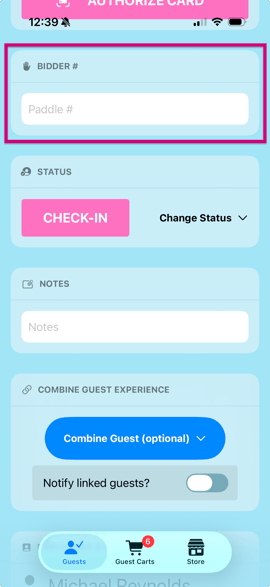
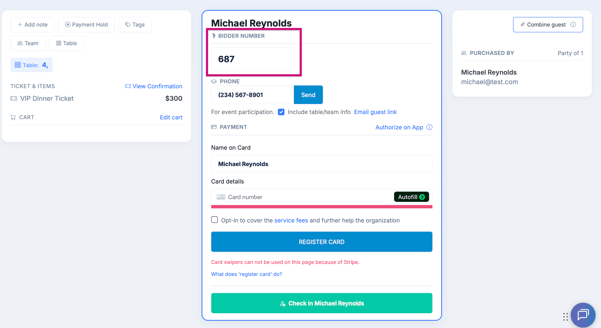
5. Tell them their table number and hand them their bidder number — they're all set.
Scenario #2: Couple or Group Check-In
- Check in the first guest using Scenario #1 above.
- Ask whether they're bidding together or separately.
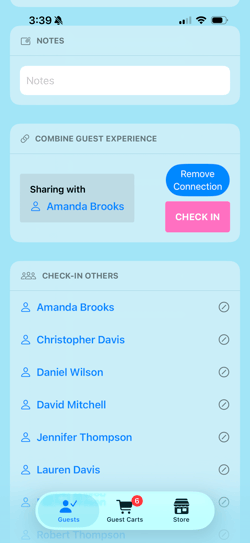
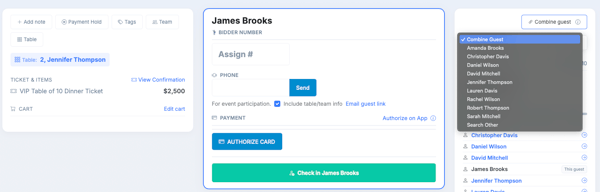
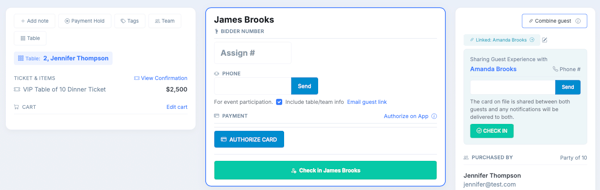
- If bidding together, tap Combine Guest Experience. This links their guest carts under the same credit card and a single receipt — if one person gets outbid, so does their partner.
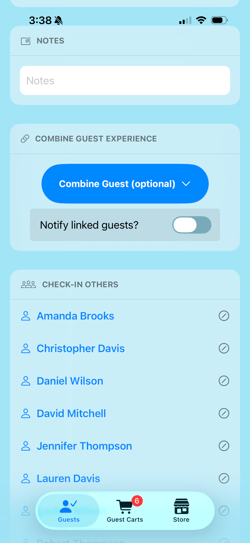
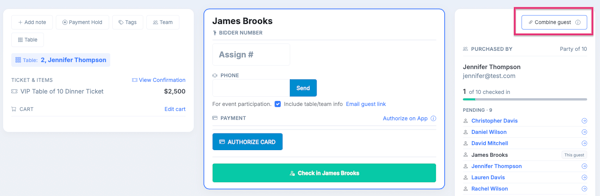
- The app will suggest other guests from the same original purchase group automatically; if the second guest isn't listed, use Search Other to check the full guest list instead. You generally won't need to assign a second bidder number, since one was already entered for the group.
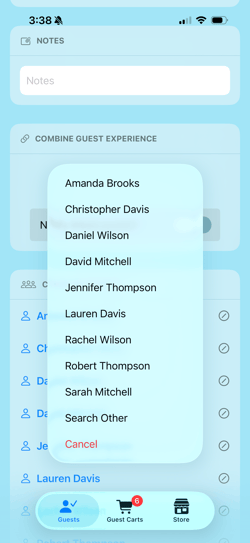
- If guests are bidding separately, open each guest's own check-in screen — either from the on-screen guest list or by searching again — and run each through the standard flow.
Scenario #3: Guest Doesn't Appear in Search
This almost always means one thing: the purchaser bought the tickets but never entered that guest's name. It doesn't mean there's no ticket for them.
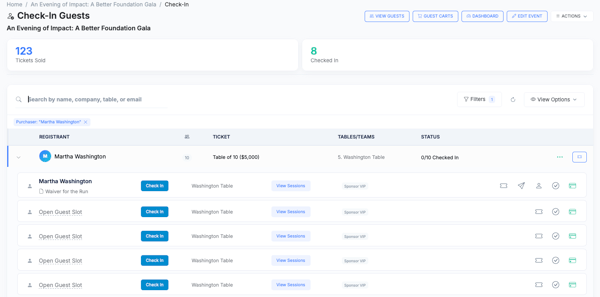
- Ask who they're attending with, and search using anything available — a last name, a company name, whatever the guest can give you.
- Once you find the purchase group, look for an Open Guest Slot. Tap it, then tap Search or Add Guest.
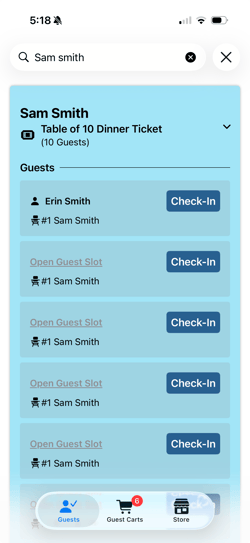
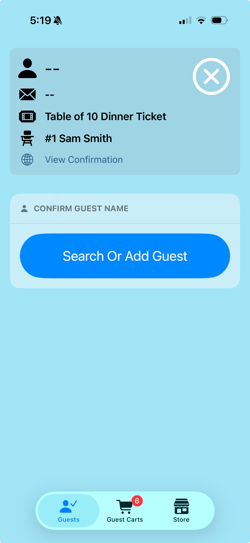
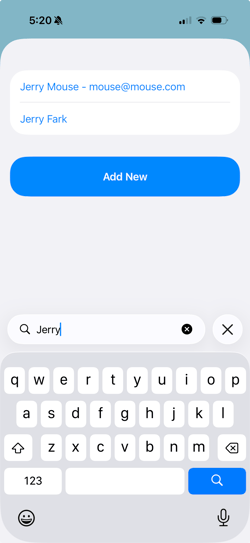
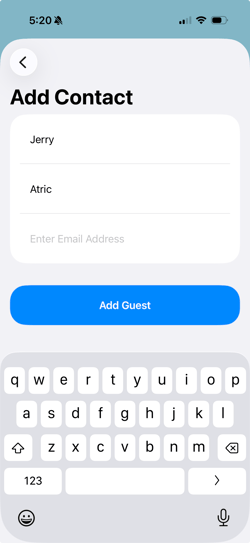
- Search your donor database first in case the person is already on file, or add their name and details from scratch, then check them in as usual.
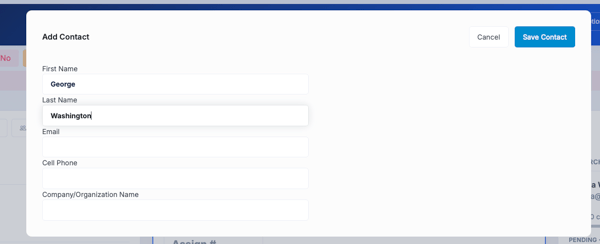
Scenario #4: Replacing a Guest
**Typically done by an admin using the desktop version.**
If someone is replacing a guest who never checked in, clear the original guest's contact information first, then enter the new guest's details in their place.
Heads up: if the original guest has already started bidding in the online auction, the system won't let you clear their information. Use Scenario #5 instead.
Scenario #5: Adding a New Guest Slot
- Search for the purchaser and on the check-in screen.
- Tap the three-dot menu and select Edit Registration.
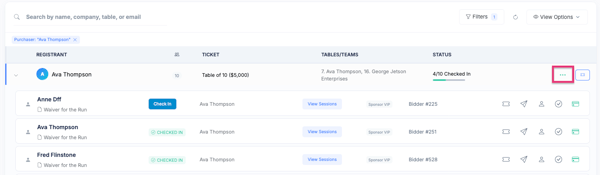
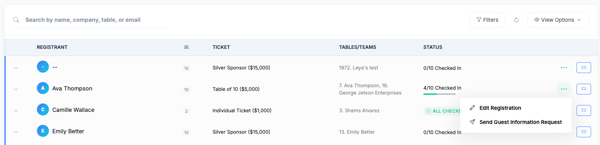
- Tap Add Guest as many times as needed to create additional slots, then fill in each new guest's details.
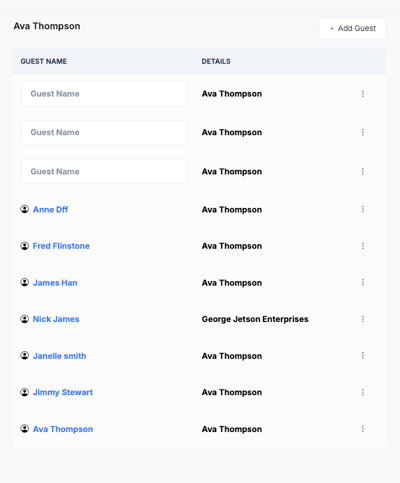
This gives every guest their own ticket and their own bidding link, rather than sharing someone else's.
Removing or Replacing a Guest Without Deleting Their Ticket
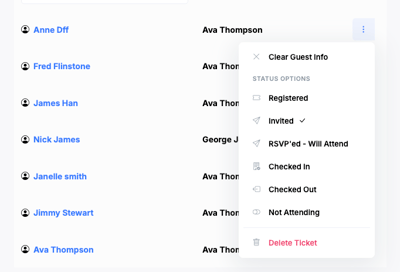
Use the three-dot menu on a guest's check-in screen to either clear their information (turning it back into an open guest slot) or mark them as Not Attending.
- Not Attending removes the guest from all future event communications without deleting their ticket.
- A guest marked Not Attending can still bid in the online silent auction even though they aren't physically at the event.
Working from a Web Browser
Everything above works the same way from a browser, with a few extras:
- Search by name, company, table number, or email from the search bar at the top.
- Add items to a guest's cart directly — handy if you're selling items for sale at the door.
- Fill in custom guest fields (like t-shirt size) and add internal notes or tags.
- Combine Guest Experience and Search Other work exactly the same as they do in the app.
Frequently Asked Questions
Do I need to check guests in from the app, or can I use a browser instead?
Either works, and you can mix both at the same event — the app and browser view read and write to the same guest data in real time.
Do I have to assign a bidder number to every guest?
Yes, for anyone who plans to bid or make purchases — it's how their activity gets tracked. In a combined guest experience, one bidder number typically covers the whole group.
What if I can't find a guest's name in search?
Search by the purchaser's name, company, or group name instead. This almost always means the purchaser bought tickets but didn't enter every guest's name — the ticket still exists.
Can two guests share a credit card?
Yes — tap Combine Guest Experience to link their guest carts under one card and one receipt. If either person gets outbid, both are outbid, since they're bidding as a unit.
Can a guest marked Not Attending still participate in the auction?
Yes. Marking a guest Not Attending only removes them from future event communications — it doesn't delete their ticket, and they can still bid online.
Can I pre-authorize a card without the guest handing it to me?
Yes. Guests can pre-authorize their own card through the personal link included in their welcome text, before or during the event.
That concludes our guide on handling common guest check-in scenarios. You're now ready to check in your guests! Up next: explore Event Checkout.
HERE is a sample script for your registration team to use.
Need Additional Help?
We're here to assist you in any way we can. Don't hesitate to reach out to support@betterunite.com
Let's go do some good.