-1.png?width=240&height=100&name=Heading%20(2)-1.png)
In order to establish a connection from your BetterUnite account to your Shopify Store, you will need to configure a custom app in your store with a few clicks. The integration will only read information from your store, it will not write anything to your store. This is also under your full control as you provide access rights to the app as you set it up below.
Please see full instructions with screenshots below.
- Login to your Shopify store account
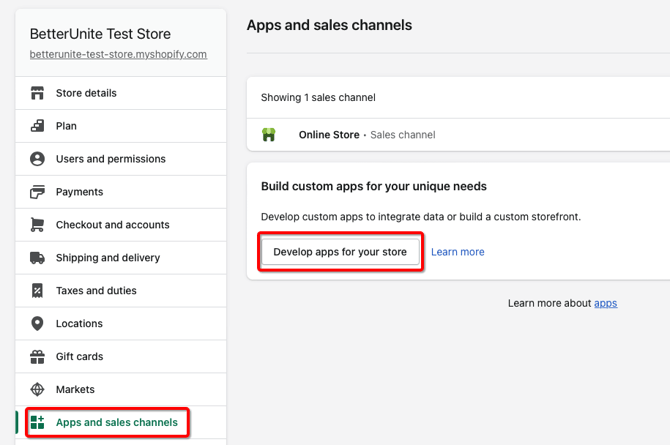
- On your Shopify dashboard, click on Settings.

- Click Apps and Sales Channels on the settings pop up page

- Click the Develop Apps for your store button
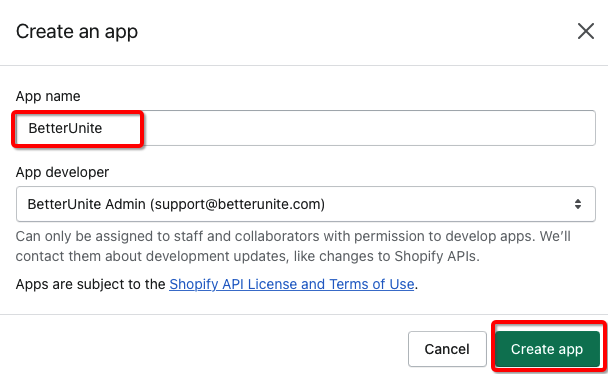
- Click the green Create an App button on top of the page

- Give your app a name, e.g. BetterUnite, for easy identification, and click Create App to create the app
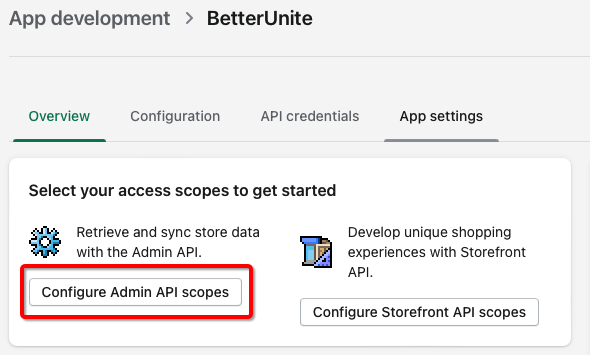
- On the Overview tab of your new app, click the Configure Admin API Scopes button to configure access rights for this integration
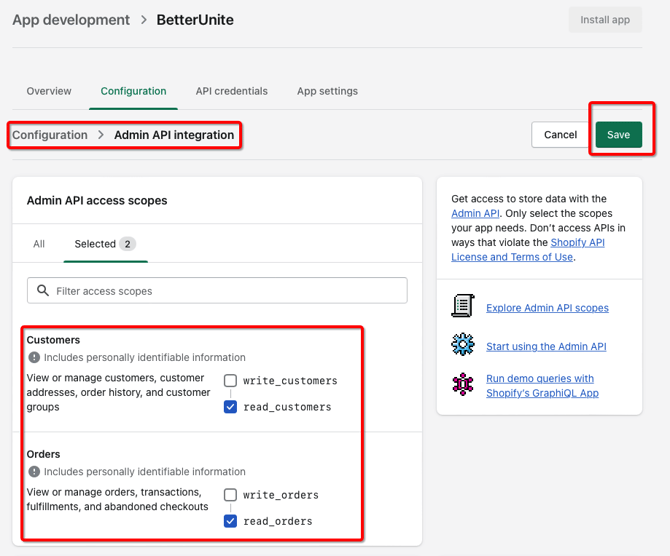
- In the list of access scopes, check the following access rights: Customers->read_customers, Orders->read_orders and click Save.
- Click the API Credentials tab, and click the green Install App button and confirm installation.
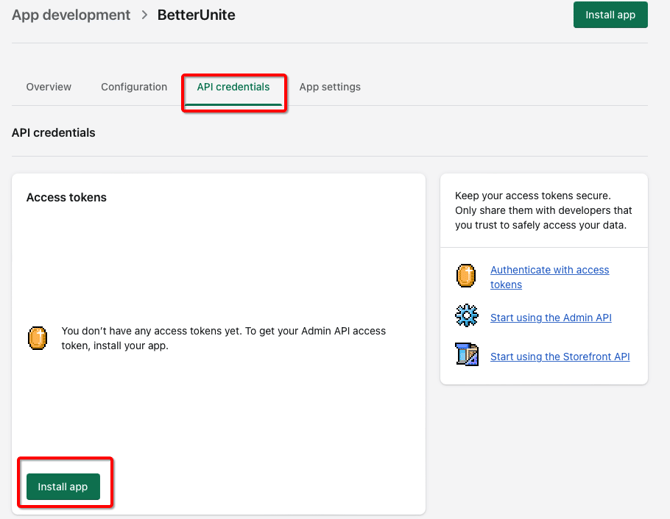
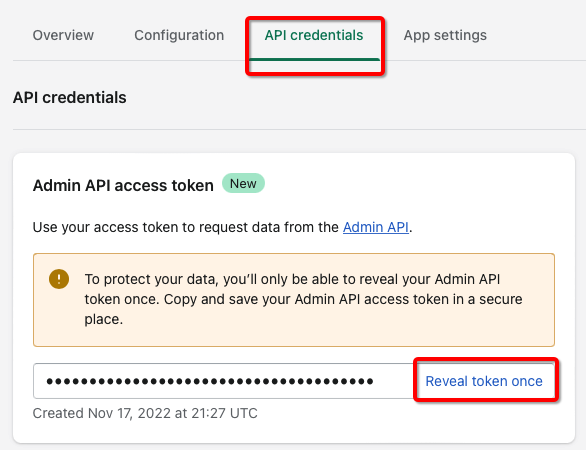
- This part is important:click the link Reveal token once and be sure to copy the key somewhere immediately. This is the key we will need to establish a connection to your store.
- Note your Shopify store url. We just need the main url of your Shopify store, for example: https://xyz-test-store.myshopify.com
- Come back to the Shopify integration setup page in your BetterUnite settings, and click Enable Shopify Import, paste the above values into the corresponding textboxes and click submit.
What data is imported from Shopify
The integration is read-only and pulls paid transactions from your store. It reads your Orders (any status) and each order's payment transactions (this is why the app only needs the read_orders and read_customers scopes). You can optionally set a start and end date to limit the import to a specific range.
Each Shopify payment transaction becomes one donation in BetterUnite, attached to a contact. Here's exactly what gets mapped:
Contact (from the order's Shopify customer)
| BetterUnite contact field | From Shopify |
|---|---|
| Customer email | |
| First name | Customer first name |
| Last name | Customer last name |
| (internal link ID) | Shopify customer ID — stored so the same customer isn't duplicated on future imports |
How contacts are matched (in order): first by Shopify customer ID from a previous import, then by email address (oldest matching contact wins). If neither matches, a new contact is created.
Donation (from the Shopify transaction)
| BetterUnite donation field | From Shopify |
|---|---|
| Amount | Transaction amount |
| Date | Transaction processed date (UTC) |
| Payment type | Credit Card (recorded as an offline payment) |
| Campaign | Your organization's Default Campaign |
| Internal note | Imported Shopify payment # <transaction ID> |
| (internal reference ID) | Shopify transaction ID — stored to prevent duplicate imports |
Good to know
- No duplicates: transactions already imported (matched by their Shopify transaction ID) are skipped, so it's safe to run the import more than once.
- All donations land in your Default Campaign — there's no per-product or per-order campaign mapping.
- Payments with no associated customer are skipped (a contact is required).
- Not currently imported: phone number, billing/shipping address, product/line-item details, order number, and taxes or shipping — only the payment amount, date, and the customer's name/email come across.