-1.png?width=240&height=100&name=Heading%20(2)-1.png)
Showtimes
In some cases, an event may be comprised on multiple showtimes. For instance, a performer may repeat their show on same or different dates, in multiple showtimes. In this case, instead of creating a separate event for each performance, you would create a single event for the artist/performance, and define multiple showtimes. Each showtime is ticketed separately. A guest would purchase a ticket for a particular showtime, not the event as a whole.
Create Multiple Showtimes
- Navigate to your Edit Event Page.
- Click on More Options option and select Manage Showtimes.

- On the calendar, navigate to the date and time slot of your show times, and click on the time slots to create a new show time.
- You can drag the edges of each entry on the calendar to adjust the time frame.
- You can drag the calendar entry to move it to a different date/time slot.
- Every time you click on an empty slot, and new showtime will be created.
- Once a showtime is created, it will also be displayed on the left side of the pop up window.

- You can access additional options for each session by clicking the Edit Button on the bottom right corner of each showtime entry, this will switch to the Edit Showtime Tab.
- On the Edit Showtime tab, you will be able to provide a name, description and a general active/inactive status for the showtime.

- If you have defined tickets for your event, all the tickets will also be displayed in the edit showtime tab.
- You can associate one or more tickets for each showtime, and specify any capacity indicators on a per ticket per session basis as well. e.g. the 2nd show is in a smaller space, and the general admission tickets for the 2nd show needs to be capped at a certain number.

Buy Tickets for a Show
- Using the above methods, you can define all the showtimes, and the corresponding available tickets per showtime.
- Based on this definition, when a guest visits the event page to purchase tickets, each active show time will be displayed to the payer to choose from.

- Once the showtime is selected, the guest will be presented with the available tickets eligible to be purchased for that show time with any specific capacity limitations.

- Any purchased showtime information is also displayed on the Manage Event page listing of purchased tickets.
Sessions
Some events may be comprised of multiple time slots, we call them Sessions or an Agenda, with specific session content and capacity/availability per session. When a guest purchases tickets for this event, they may be asked to select from multiple sessions. In some cases, there may be multiple sessions in the same time-slot and the guest may be asked to choose one or more of many options. All of these variations comprise the event sessions. Here is the break down.
Create Sessions
- Navigate to the Edit Event Page.
- Locate the More Options tab and then go to Agenda/Sessions.
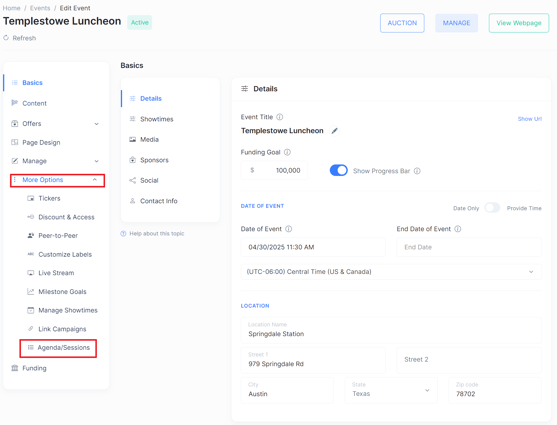
- Click Add Session to view the Add New Session window.

- Provide the details of your session, including name, description, start time, end time, capacity if any.
- If the session is part of a group, you can specify it here as well.

- The sessions that you entered will show under the Sessions tab in your Edit Event page as per below.

Session Groups
- If you are creating grouped sessions, you should first create the Session Groups by clicking the Add Session Group button in the Sessions tab.
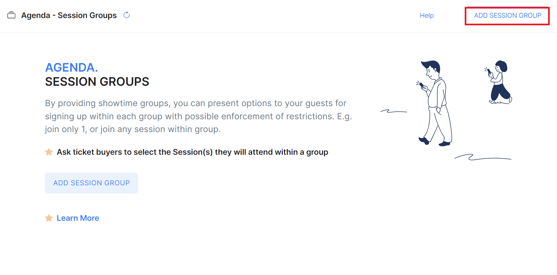
- When creating the group you can provide name, description and the max number of allowed session selections within this group (typically 1, but is up to you based on your agenda).
- After creating the groups, you can create the sessions, and on each grouped session you can specify the group to associate the session.

Session Selections
- If an event includes sessions, these sessions will be presented to the ticket purchaser in the confirmation page.
- There will be a session selection section displayed for each participant/guest in the registration.
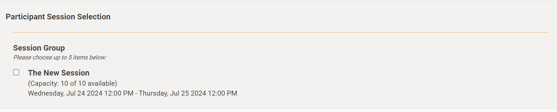
- If registrant purchased two tickets, there will be a session selection area shown for each attendee/guest. The registrant or each guest can make their specific session selections on this page. The registrant may also choose to send the individual attendee their ticket, in which case the specific guest can update their own agenda selection as well.
- In the example below the first guest selected Session 1 where there was only capacity of 1 available.
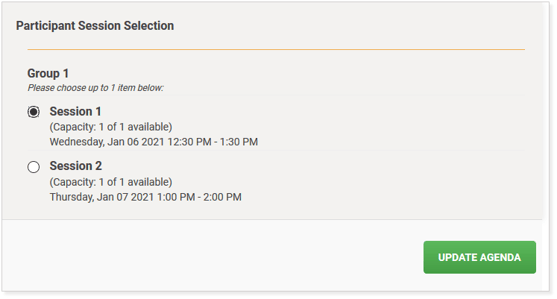
- The second guest in the example below had to make a selection on Session 2 as Session 1 was already full.

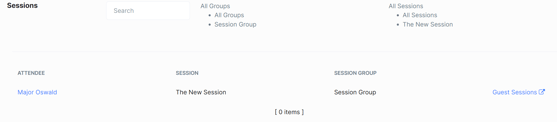
- Event organizers can also view guest session selections in multiple areas.
- Session selections are displayed at the bottom of the Manage Event page. This area allows filtering based on sessions, as well as searching for particular guest to see their session selections.
- Session selections are displayed on each attendee in the Guest Check In page.
- In this case, during check in process, you can verify whether the guest has picked out their sessions, and you can also click to view and edit the session selections on an ad-hoc basis as well. Note that exporting the attendees will also include information about whether the guest has picked their sessions or not.
Need Additional Help?
We're here to assist you in any way we can. Don't hesitate to reach out to support@betterunite.com
Let's go do some good.