-1.png?width=240&height=100&name=Heading%20(2)-1.png)
To give volunteers access to guest check-in without granting them full admin access, add each volunteer as a user in BetterUnite with the Guest Check In Only role, then share the direct URL to your event's Check-In Guests page. The steps below walk you through both tasks. In this case, you would need to allow them access the system so that they can check in guests, but restrict their account to only functions around checking in guests. To accomplish this, follow the below steps:
How do you add each volunteer as a restricted user?
- Click Settings (gear icon in the top right corner of the navigation bar).
- Go to the Users tab.
- Click Add New.
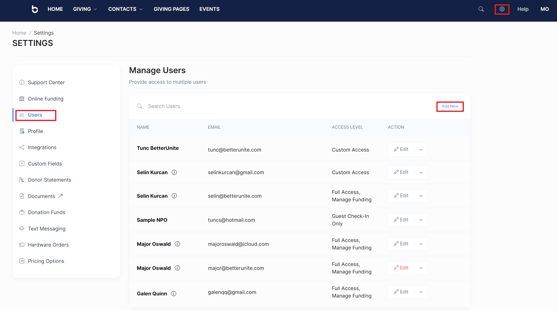
- Fill out the user information.
- For role selection, only check the box that reads "Guest Check In Only".
- Click Add User.
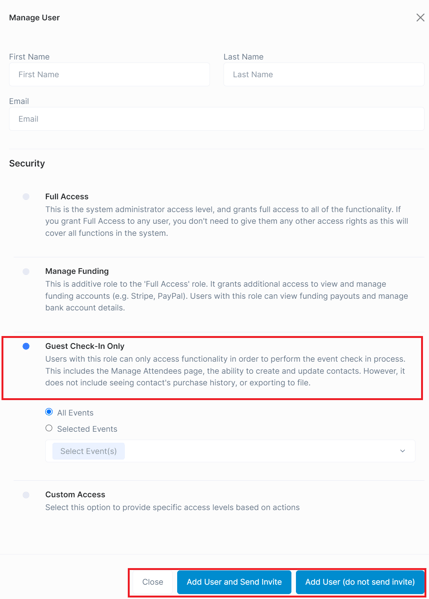
- When you add a user, they will receive an email notification with a link to set their password and log in for the first time.
- For more details on how to add users refer to article Manage Users.
Provide the volunteers the information about your event
- Volunteers with the Guest Check In Only role can only access pages relevant to their assigned functions, so you must send them a direct link to your event's check-in page. To get this link:
- Go to the Manage Event page for your event.
- Click Check-In Guests.
- Copy the URL from your browser's address bar.
- Email the URL to your volunteers.
- Simply go to the Manage Event Page and then Check-In Guests.
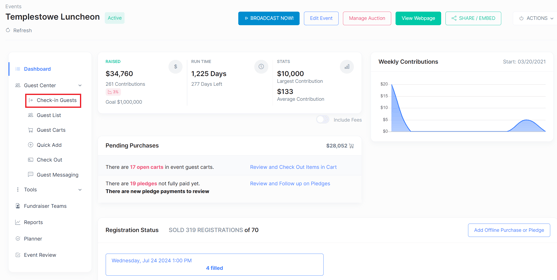
- Copy the URL and email your volunteers this url.
- After a volunteer has clicked the link in their invitation email, set their password, and logged in, they can go directly to the URL you sent them to access the Guest Check-In page.
Need Additional Help?
We're here to assist you in any way we can. Don't hesitate to reach out to support@betterunite.com
Let's go do some good.