
How jobs and shifts work together
- Jobs are the specific tasks you're asking volunteers to do. When someone signs up, they're signing up for a job. Every volunteer sign-up page needs at least one job.
- Shifts break the work into dates and times. Each job can be offered on one or more shifts.
- When your page has shifts, volunteers pick a shift first and then see the jobs available on that shift.
If you only need one date and time, you can skip shifts entirely: create your jobs and set the event date on the sign-up page. Shifts are for pages that need several dates or time slots.
Tip: Create your jobs first, then your shifts. When you add a shift, you choose which of your existing jobs are available on it.
Step 1: Open your sign-up page
- Go to Volunteers
- Open the sign-up page you want to work on. If you haven't created one yet, select Create a Sign Up Page, enter a title, and click Create Sign Up Page.
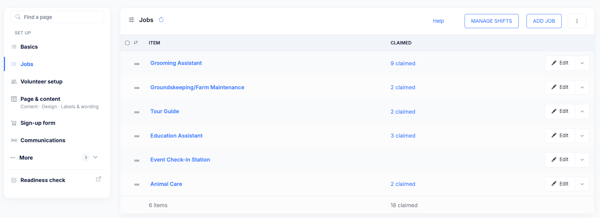
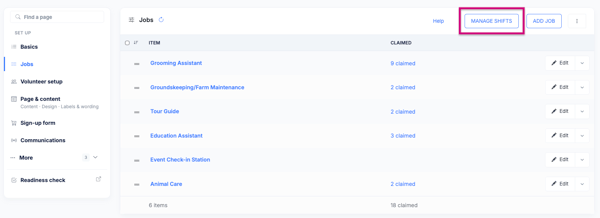
- On the page's Edit screen, find the Jobs section. This is where you'll add jobs and where you'll find the button for managing shifts.
Step 2: Add your jobs
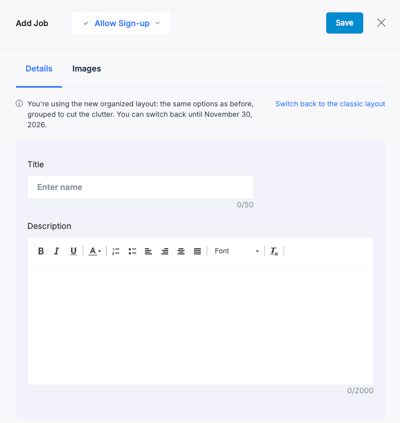
- In the Jobs section, click Add Job.
- Enter a Title for the job, such as "Greeter" or "Registration Desk" (up to 50 characters). Volunteers will see this on your sign-up page.
- Add a Description if you'd like to tell volunteers what the job involves, what to wear, or where to go. This is optional (up to 2,000 characters).
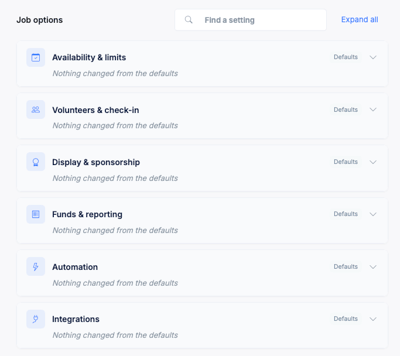
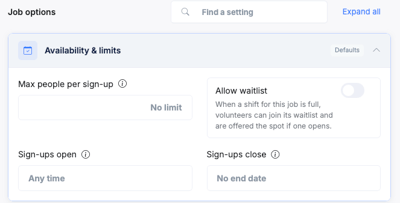
- If your page does not use shifts, enter how many volunteers you need in the quantity field. Leave it blank for no limit.
- Save the job.
Repeat for each task. You can edit or update a job any time from the same section.
Note: Once your page has shifts, the number of volunteers you need is set per job on each shift (see Step 3), so the quantity field on the job itself no longer applies.
Step 3: Add your shifts
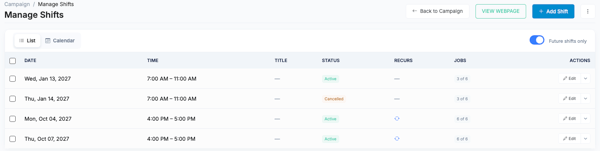
- In the Jobs section, click Manage Shifts.
- Click Add Shift.
- Set when the shift starts and ends.
- Optional: add a Shift title (up to 35 characters, like "Morning Session") and a Description.
- Optional: set Maximum people for this shift. This caps the total number of volunteers across all jobs on the shift. Leave it blank for no limit.
- Under Jobs, check each job that should be available on this shift. Next to each checked job, you can enter a Total offered number to limit how many volunteers can sign up for that job on this shift. Leave it blank for no limit.
- Make sure Active is turned on, then click Save Shift.
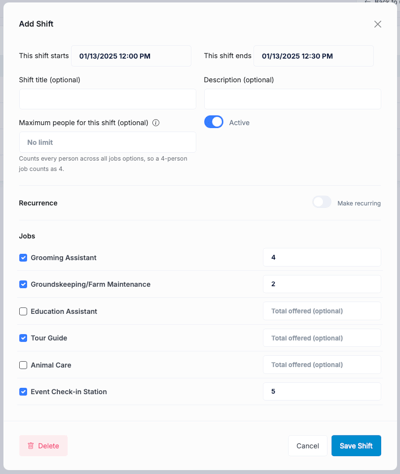
How the two limits work together: "Total offered" limits one job on one shift. "Maximum people for this shift" limits everyone on the shift, across all jobs. For example, if Greeter is limited to 4 and Setup Crew to 6 on the same shift, but the shift maximum is 8, the shift will fill at 8 volunteers even if neither job has reached its own limit.
Repeating a shift (recurring shifts)
If a shift happens on a regular schedule, you can create the whole series at once when you add it.
- In the new shift, turn on Make recurring.
- Choose how it repeats: Daily, Weekly or Monthly, and how often (the Every field).
- For weekly shifts, pick the days of the week.
- Set a Series end date. A preview of the shifts that will be created appears so you can check it before saving.
- Click Save Shift.
The recurring option is only available when you're creating a new shift. For more detail on editing or deleting a series, see Recurring Shifts, and Bulk edits & deletes.
Viewing, editing and deleting shifts
- List and Calendar views: The Manage Shifts page shows your shifts as a list or on a calendar. By default it shows future shifts only. Turn off Future shifts only to see past shifts too.
- Editing: Open a shift to change its time, title, limits or jobs. If the shift is part of a recurring series, you can choose to Apply changes to all future occurrences.
- Deleting: For a recurring shift you can delete this shift only or this and future shifts.
- Pausing a shift: Turn off the Active switch on a shift to stop it from appearing on your sign-up page without deleting it. To change the status of several shifts at once (Active, On Hold or Cancelled), select them in the list and use the bulk action Set status.
Check what volunteers see
From the Manage Shifts page, click View Webpage to open your live sign-up page. Walk through it as a volunteer would: pick a shift, confirm the right jobs appear, and check that the spots remaining look correct.
Troubleshooting
- A job isn't showing on a shift. Open the shift and make sure the job is checked in the Jobs list. A job only appears on shifts it has been added to.
- A shift isn't showing on the sign-up page. Check that the shift is set to Active and hasn't already ended. Shifts that are On Hold or Cancelled aren't available to sign up for.
- A shift shows as full. Check both the job's Total offered and the shift's Maximum people. Either limit can fill the shift. Raise or clear the number to open more spots.
- I can't find the quantity field on my job. When a page has shifts, spots are set per shift instead of on the job.